Back to AQA Loci & Construction (F) Home
4.2 C) Construction: Perpendicular Lines
4.2 C) Construction: Perpendicular Lines
Constructions are accurate drawings that have been drawn using a compass and a ruler. Throughout this section and the next sections, we are going to be looking at how to accurately draw perpendicular lines and a variety of different triangles. Let’s start by drawing perpendicular lines.
Click here for a printable version of the examples in this section.
Click here for a printable version of the examples in this section.
Perpendicular Line
Perpendicular lines are lines that cross each other at 90°.
Perpendicular lines are lines that cross each other at 90°.
Perpendicular Lines – Point Not on the Line
We are going to be looking at how to draw a perpendicular line between point A (which is not on the line) and the line.
We are going to be looking at how to draw a perpendicular line between point A (which is not on the line) and the line.
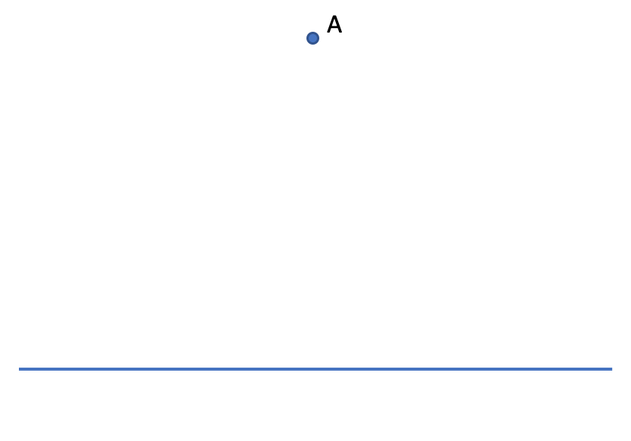
The perpendicular line between point A and the line will be the shortest distance between point A and the line. There are a few different steps to draw this line.
Step 1
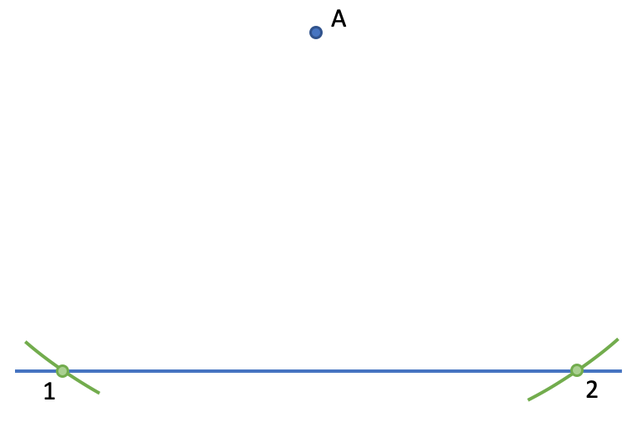
The first step is to open the compass so that it is longer than the distance between point A and the line. We then place the point of the compass at point A and draw two arcs that cross the line either side of point A. I have labelled these two points 1 and 2.
Step 1
The first step is to open the compass so that it is longer than the distance between point A and the line. We then place the point of the compass at point A and draw two arcs that cross the line either side of point A. I have labelled these two points 1 and 2.
Step 2
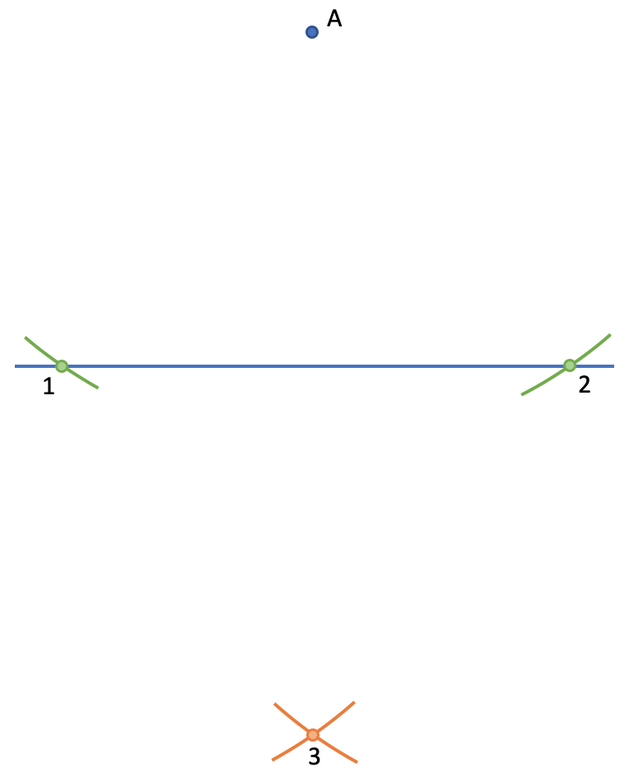
Without changing the length of the compass, we place the point of the compass at each of the points that we have just created (point 1 and 2) and draw a new arc. We want the arcs from point 1 and 2 to cross, which creates point 3.
Without changing the length of the compass, we place the point of the compass at each of the points that we have just created (point 1 and 2) and draw a new arc. We want the arcs from point 1 and 2 to cross, which creates point 3.
Step 3
The final step is to place a ruler connecting point A and point 3. We then draw a line from A to the line that we were given in the question.
The final step is to place a ruler connecting point A and point 3. We then draw a line from A to the line that we were given in the question.
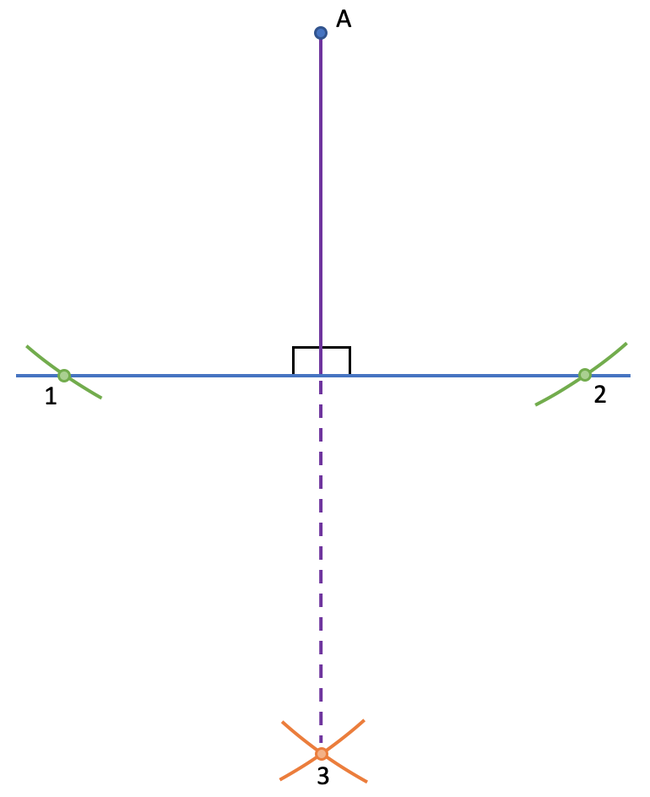
The line that we have drawn will be perpendicular to the line that we were given.
Perpendicular Lines – Point on the Line
The process of drawing a perpendicular line from a point that lies on the line is slightly different. We are going to be drawing a perpendicular line from point B on the line below.
The process of drawing a perpendicular line from a point that lies on the line is slightly different. We are going to be drawing a perpendicular line from point B on the line below.

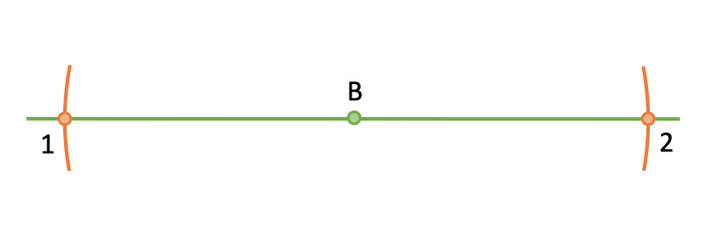
Step 1
The first step is to set your compass to a particular length (around 4 or 5 cm). We then place the point of the compass at point B and draw two arcs that cross the line; we draw one arc to the left of point B and the other arc to the right of point B. I have labelled the point on the left of B point 1, and the point of the right of B point 2.
The first step is to set your compass to a particular length (around 4 or 5 cm). We then place the point of the compass at point B and draw two arcs that cross the line; we draw one arc to the left of point B and the other arc to the right of point B. I have labelled the point on the left of B point 1, and the point of the right of B point 2.
Step 2
The next step is to open out the compass by a few centimetres. We then place the point of the compass at point 1 and 2 and draw an arc from both of these points. We want the arcs from these two points to cross one another below the line. I will label the point where they cross point 3.
The next step is to open out the compass by a few centimetres. We then place the point of the compass at point 1 and 2 and draw an arc from both of these points. We want the arcs from these two points to cross one another below the line. I will label the point where they cross point 3.
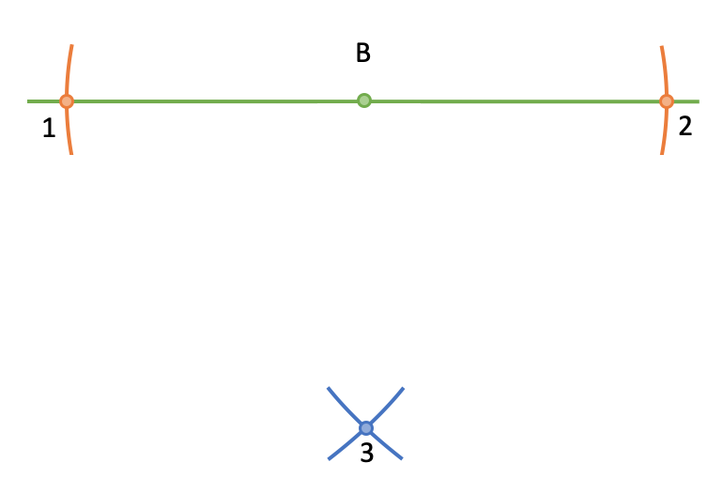
Note: you could have had the two arcs crossing one another above the line if you prefer.
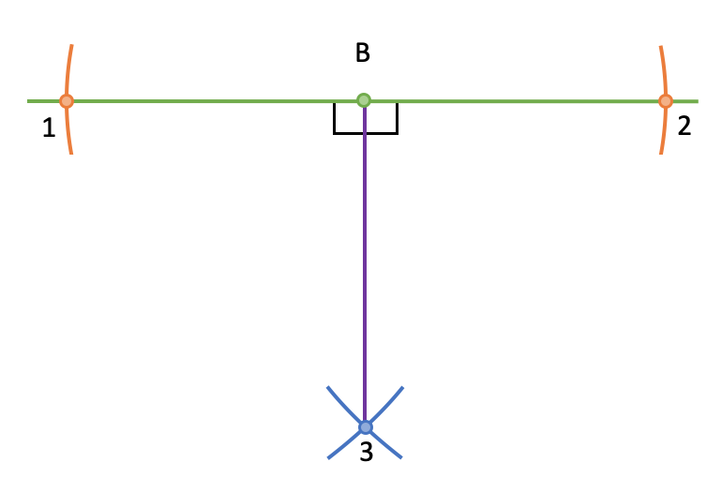
Step 3
The final step is to draw a line from point 3 to point B using a ruler. We now have our perpendicular line.
Step 3
The final step is to draw a line from point 3 to point B using a ruler. We now have our perpendicular line.
Final Note
It is a good idea to have a revision card that has the rules on this page and the next pages. This is so that you can revise these rules right before the exam. For questions like this, you cannot really use intuition to work out the answer, which means that it is essential that you remember the steps.
It is a good idea to have a revision card that has the rules on this page and the next pages. This is so that you can revise these rules right before the exam. For questions like this, you cannot really use intuition to work out the answer, which means that it is essential that you remember the steps.